Glaze
Runny Glazes
Mastering the Art of Runny Glazes
Adding glazes to pottery is one of the most exciting stages of the ceramic process, where your artistic vision truly comes to life. However, working with runny glazes presents a unique set of challenges. These glazes, often prized for their stunning flow and depth, require extra care and preparation to avoid mishaps in the kiln. Follow this guide to achieve beautiful results while protecting your work—and the kiln shelves!
Why Use Runny Glazes?
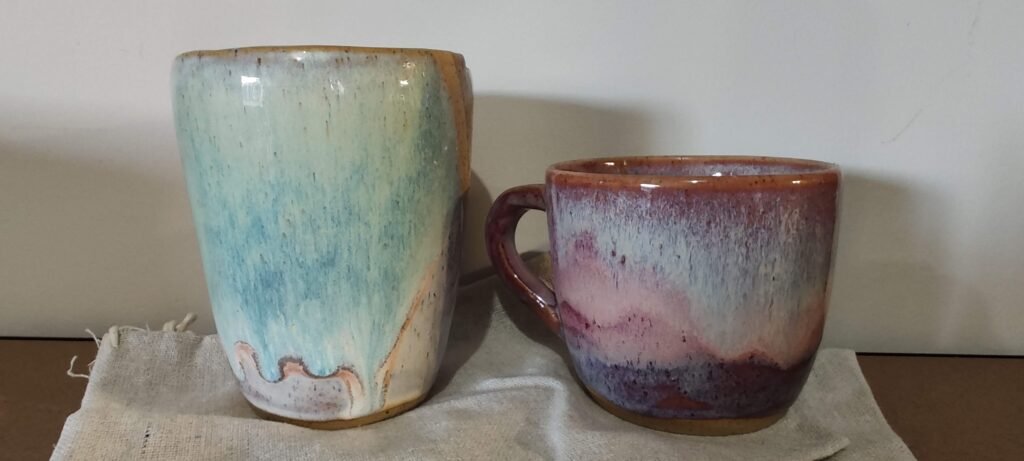
Runny glazes create dynamic, fluid patterns that can mimic natural forms, like dripping water or molten lava. They can add depth and complexity to your pottery that more static glazes might not achieve. However, their tendency to flow during firing means they must be used strategically to prevent unintended messes.
1. Leave a Gap at the Bottom
The first rule of working with runny glazes is to leave an unglazed gap near the bottom of your piece. This gap acts as a safety zone, allowing the glaze to move during firing without reaching the base.
How Much Gap Should You Leave?
A good rule of thumb is to leave at least .7 to 1.5 cm unglazed from the bottom. For particularly runny glazes, you will absolutely need to consider leaving a slightly larger area. Use masking tape “during application” if you want a clean, even line where the glaze stops.
Build up around the base of handles can also present more of a problem, so try not to allow too much build up in that area.
2. Use Cookies for Protection
No matter how careful you are, some glaze drips are inevitable. To protect the kiln shelves, always place your pieces on “cookies.” These are small discs made of bisque-fired clay that act as a sacrificial layer, catching any drips that might otherwise ruin the kiln shelf.
How to Make or Source Cookies:
-
DIY Cookies: Roll out a thin slab of clay, cut out discs slightly larger than the base of your pottery, and bisque-fire them.
-
Reuse and Replace: Cookies can be reused multiple times unless a glaze drip fuses them to the pottery.
-
Our Kiln: We do have limited cookies available but we encourage you to make some for your pieces. If there is an issue with the glaze and it sticks, then it would need to be cut away.
3. Test Your Glaze
Before committing to a large batch, test your glaze on a small piece. Each kiln and firing schedule can affect how much a glaze runs, so a quick test will help you anticipate how it behaves.
Tips for Testing:
-
Use test tiles with both flat and vertical surfaces to see how the glaze flows.
-
Mark the gap distance to see if your safety zone is sufficient.
4. Layer with Care
Layering glazes can create incredible effects, but it also increases the risk of runs. When layering:
-
Apply thinner coats.
-
Avoid overlapping too heavily near the bottom of the piece or around any handles.
-
Use wax resist to maintain your safety gap.
5. Communicate with Us.
If you’re using our Kiln, please let us know you’re using a runny glaze. Being upfront can save everyone from unnecessary headaches!
Final Thoughts
Runny glazes can elevate your pottery to an entirely new level of artistry, but they demand respect and preparation. By leaving a gap, using cookies, and testing thoroughly, you can create stunning pieces without the risk of kiln disasters.
Remember, each piece of pottery is a learning experience, so embrace the process and enjoy the beautiful unpredictability that runny glazes can bring to your work!

